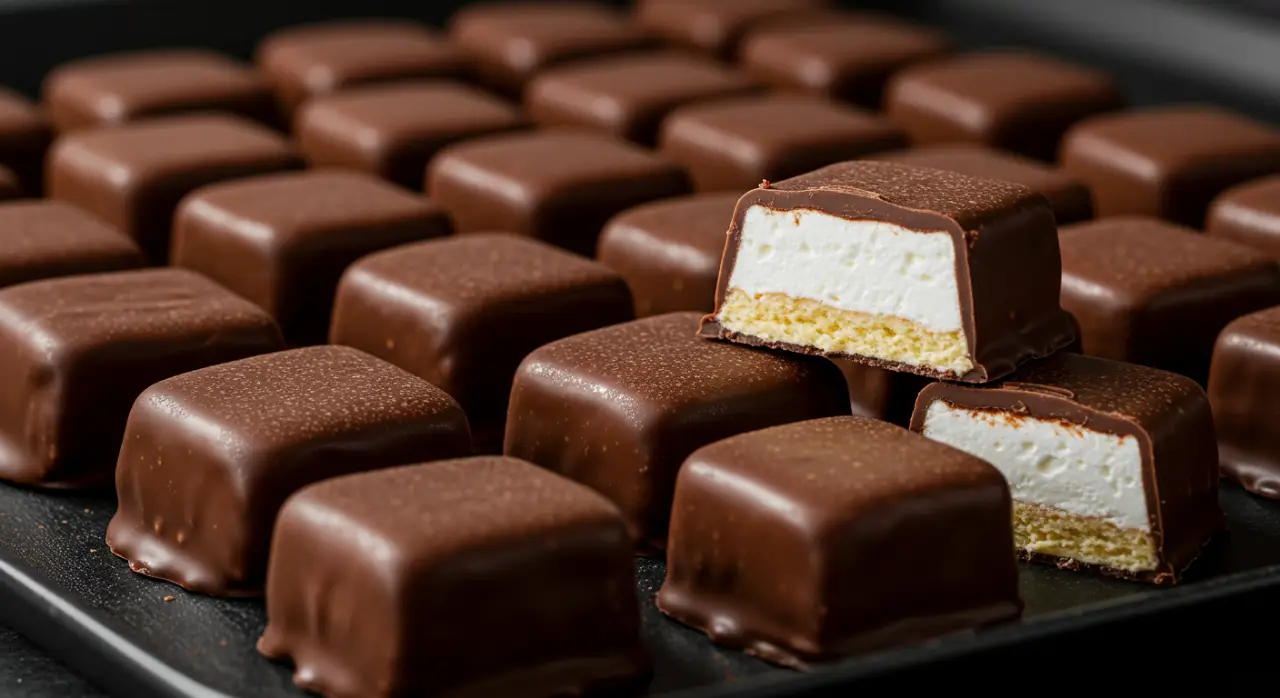
Got a sweet tooth but not enough time or patience to whip up something fancy? Well, you’re in luck! Cool Whip Candy is here to save the day—your newest snack obsession that’s ridiculously easy to make and tastes just like a homemade Three Musketeers Copycat! It’s fluffy, chocolatey, and seriously addicting, with only three simple ingredients you probably already have in your kitchen. No candy thermometer or fancy tools required—how cool is that?
This article will take you on a sugar-laden ride through everything you need to know about Cool Whip Candy. We’ll be covering its origins, the foolproof steps to make it (spoiler alert—it’s basically effortless), and fun variations to jazz it up for any occasion. Plus, you’ll get some no-nonsense tips to ensure that every batch turns out perfectly.
Whether you’re hunting for an easy homemade candy to wow your guests or just want a no-bake dessert to satisfy your chocolate cravings, this is the recipe for you. Oh, and don’t worry—we’ve got answers to all your burning questions too, like how to store it or swap out ingredients.
Stick around because by the end, you’ll feel like a total pro at making Cool Whip Candy! Now, grab your microwave, and let’s jump into the sweet details. 🔥
Ingredients You Need for Cool Whip Candy
Essential Ingredients
Alright, let’s talk about what makes Cool Whip Candy such a game-changer—it’s the simplicity! You only need three ingredients, and they’re easy to find at any grocery store.
- Cool Whip: This whipped topping is the star of the recipe. Its light and airy texture is what creates that irresistible fluffy center. Make sure it’s thawed before you start—no frozen blocks here, folks!
- Milk Chocolate Chips: These give the filling its creamy chocolate flavor. Using a good-quality brand like Ghirardelli (or whatever tickles your taste buds) makes a big difference.
- Dark Chocolate Melting Wafers: For that decadent outer coating. Dark chocolate adds a nice contrast to the sweet filling, but if you’re a milk chocolate fan, you can totally swap it out.
Can You Customize the Ingredients?
The beauty of Cool Whip Candy is that it’s flexible. You can tweak it depending on your cravings, your pantry, or even the season.
- Other Chocolates? Go wild with semi-sweet, white, or even caramel-flavored chips. Just keep in mind that each option will tweak the final flavor.
- Cool Whip Alternatives: Don’t have Cool Whip? No problem. Stabilized whipped cream or a non-dairy whipped topping works too. Just hold off on fresh whipped cream—it’s too delicate for this recipe.
- Mix-ins Galore: Want to jazz it up? Toss in some crushed nuts, mini marshmallows, or a splash of peppermint extract for a holiday twist. The possibilities are endless!
See? Getting your ingredients ready for Cool Whip Candy is as easy as raiding your pantry and fridge. Now, on to the fun part—making it!
How to Make Cool Whip Candy (Step-by-Step Guide)
Step 1: Melt and Cool the Chocolate
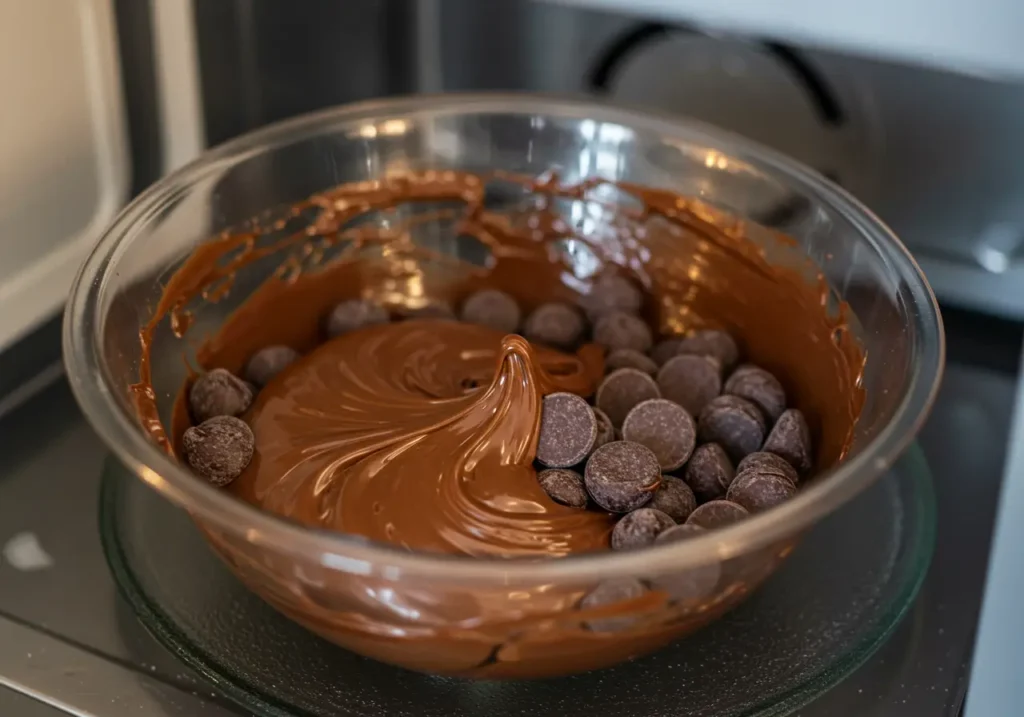
First things first—grab a microwave-safe bowl and toss in those milk chocolate chips. Melt them in the microwave in 30-second bursts, stirring between each round. Don’t overdo it—burnt chocolate smells like heartbreak! Once it’s smooth and creamy, set it aside to cool to room temperature. This step is key because adding Cool Whip to hot chocolate is a recipe for disaster (or a melty mess, to be exact).
Step 2: Create the Fluffy Filling
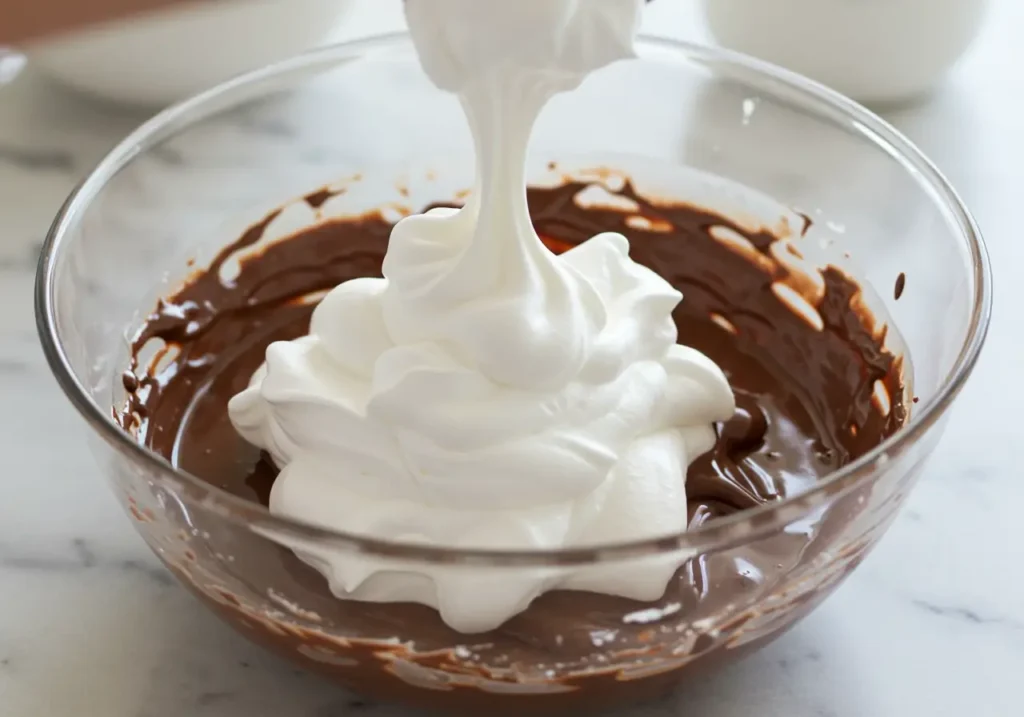
Here’s where the magic happens. Take your thawed Cool Whip and gently fold it into the melted chocolate. It might look a little chunky at first—don’t panic, that’s normal. Keep folding patiently (and gently!). You’ll end up with a light, mousse-like mixture that’s already screaming “eat me!”
Step 3: Freeze and Cut the Filling
Pour the chocolatey goodness into a parchment-lined 8×8-inch baking dish. Smooth out the top with a spatula and pop it into the freezer for about 30 minutes. Once it’s firm, take it out and slice it into squares (aim for 36 bite-sized pieces). If they’re a little uneven, who cares? Nobody’s measuring candy perfection here.
Step 4: Coating with Chocolate
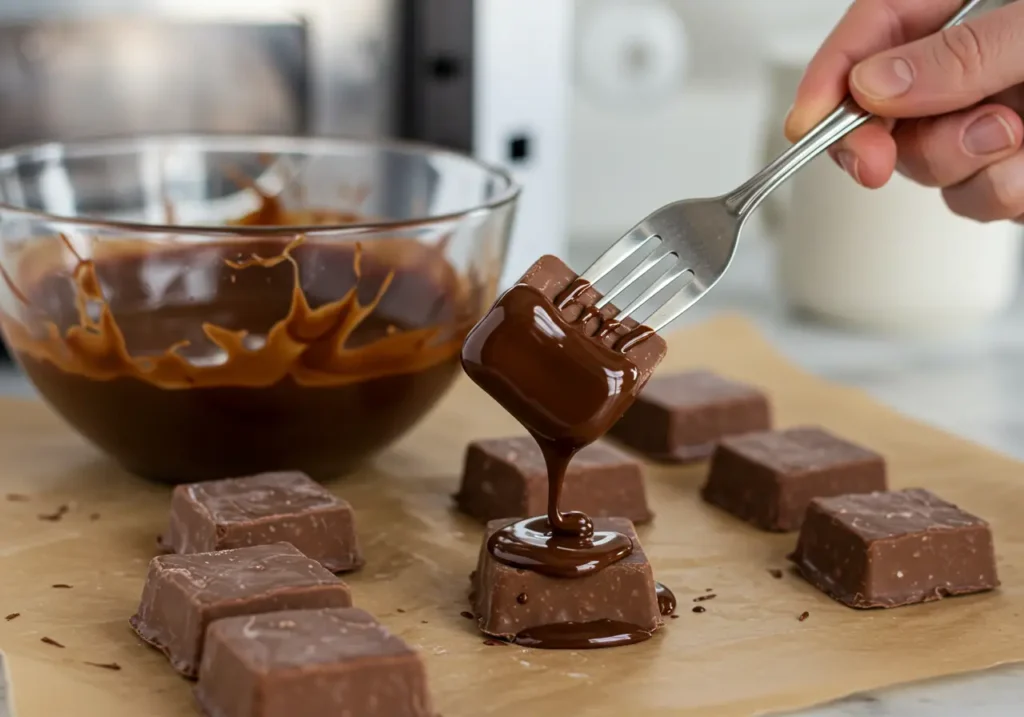
Now, for the coating. Melt the dark chocolate wafers the same way as before—short, gentle bursts in the microwave. Once melted, take your frozen candy squares and dip them into the chocolate one by one. A fork works wonders for this! Gently shake off the excess and lay them on parchment paper to set.
Step 5: Chill and Serve
Once all the squares are coated, place them back in the freezer until the chocolate firms up. And voilà! Your Cool Whip Candy is ready to steal the show. Serve it straight from the freezer for that perfect chewy texture. Trust me, everyone’s gonna ask for the recipe.
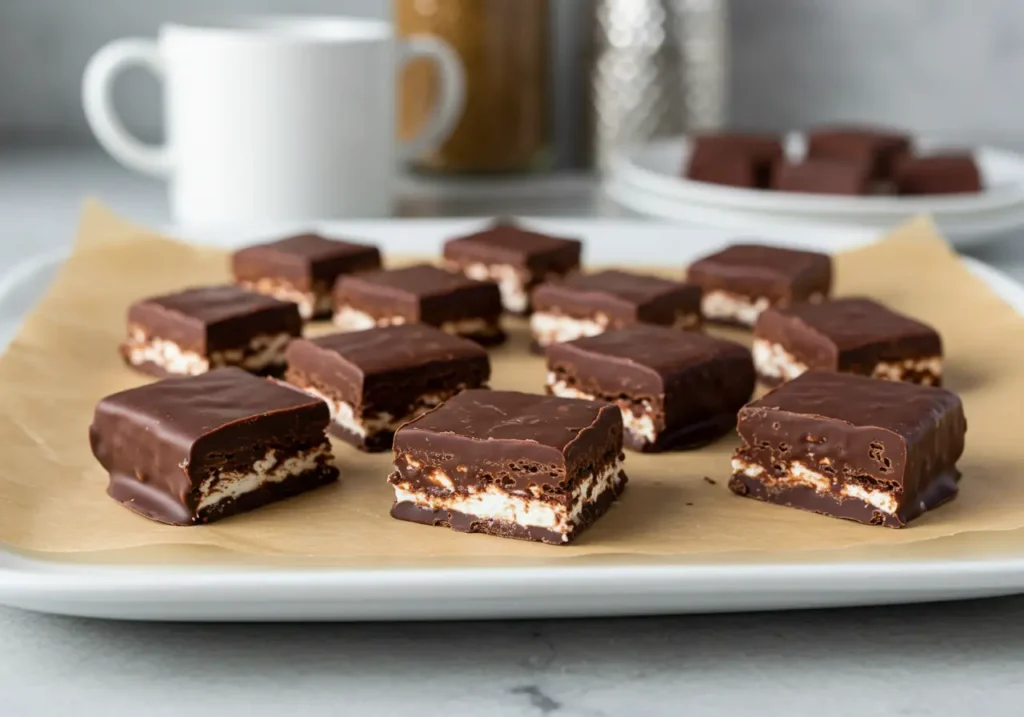
With just a few easy steps, you’ve got yourself a batch of irresistible Three Musketeers Copycat candies. It’s almost too good to be true, but hey—we’re not complaining!
Creative Variations of Cool Whip Candy
Holiday-Themed Cool Whip Candies
One of the best things about Cool Whip Candy is how versatile it is! You can dress it up for any holiday or special occasion. Add Christmas sprinkles, drizzle red and green candy melts, or toss in heart-shaped decorations for Valentine’s Day. For Halloween, go spooky with orange and black sprinkles—or even candy eyeballs. (How fun is that?)
This candy isn’t just a dessert; it’s a blank canvas for your imagination! Plus, themed Cool Whip Candies make fantastic gifts. Wrap them up in festive boxes or jars for the perfect treat.
Truffle-Style Cool Whip Candy
Want to make it a little fancier? Go for truffle-style candies. Instead of cutting the frozen filling into squares, roll it into small balls. Then coat them in crushed nuts, shredded coconut, or cookie crumbs before dipping them in chocolate. These truffle-style treats are small but packed with flavor—and they look super impressive on a dessert tray.
Using Alternative Fillings
If you feel adventurous, try switching up the filling. A peanut butter swirl, a dash of mint extract, or even caramel drizzles can add fun twists to your Cool Whip Candy. Serve these to guests, and they’ll be dying to know your secret ingredient. (Shh, we won’t tell!)
For another easy and fun recipe to try, check out our desserts collection. They pair perfectly with Cool Whip Candy!
Why You’ll Love Making This Recipe
Budget-Friendly and Easy to Prepare
Homemade Cool Whip Candy is way more affordable than hitting the candy aisle at the store. All you need are a few cheap ingredients. Even better, you can make a whole batch in under an hour (most of that is freezer time!). It’s the kind of recipe that makes you feel like a candy-making genius with zero effort.
No Special Equipment or Skills Needed
You don’t need professional candy-making gadgets for this one. Heck, you don’t even need a stand mixer! A microwave and a spatula are your best friends here. If you can fold Cool Whip into melted chocolate, you’re basically a pro at making this candy.
Perfect for Gifting or Sharing
Cool Whip Candy is the kind of treat people rave about. Wrap up a box for friends, bring some to a potluck, or stash a few in your freezer for when you’ve got a chocolate craving. These little squares of joy are made for sharing—though we wouldn’t judge you for keeping them all to yourself!
Take my word for it—once you try making these, they’ll become your go-to for every occasion. And for more fun recipes to wow your family and friends, swing by our desserts section. After all, you can never have too many sweet treats!
Tips for Making the Perfect Batch of Cool Whip Candy
Keep the Chocolate Temperature Just Right
A key detail when making Cool Whip Candy is working with chocolate at the right temperature. Melted chocolate that’s too hot can cause the Cool Whip to deflate, turning your fluffy filling into a sad, runny mess. Be patient and allow the chocolate to cool to room temperature after melting—this simple step makes all the difference.
Use Parchment Paper for Easy Cleanup
When freezing your candy filling or setting the coating, line your dish or tray with parchment paper. Trust me, this will save you from scraping chocolate off your counters later! Plus, it’s much easier to lift the candy out in one piece when you’re ready to slice.
Work Quickly When Coating the Candy
Time is of the essence when dipping the frozen filling squares into melted chocolate. The chocolate sets quickly due to the frozen filling, so don’t dawdle! Prep everything before dipping to make the process more seamless—place your tools, bowls of chocolate, and parchment tray close together for easy access.
Storing Your Candy the Right Way
Cool Whip Candy is best enjoyed straight from the freezer. Keep it in an airtight container to prevent freezer burn, and it’ll stay fresh and tasty for up to two weeks. If you’re making it in advance for a party or gifts, this tip will come in clutch!
Need more advice on mastering simple dessert recipes? Take a look at our quick tips for no-bake treats—perfect for when you’re short on time but still want something sweet.
Frequently Asked Questions About Cool Whip Candy
Can I Make Cool Whip Candy in Advance?
Absolutely! Cool Whip Candy is a make-ahead marvel. Since it keeps so well in the freezer, you can prepare it days (or even a week) in advance. Just be sure to store it in an airtight container to keep it fresh.
What If I Don’t Have a Freezer?
No freezer, no problem! You can chill the filling in the fridge, but be prepared for it to take a bit longer to set—about 2-3 hours instead of 30 minutes. The key is to make sure it’s firm enough to slice and dip into the chocolate coating.
Can I Use Dairy-Free Ingredients?
Yes! You’ve got options if you’re going dairy-free. Look for non-dairy whipped topping alternatives and dairy-free chocolate. The taste and texture might vary slightly, but it will still deliver that sweet, chocolatey goodness.
How Should I Serve Cool Whip Candy?
These little treats shine on their own, but there’s no rule against pairing them with other desserts. Add them to a dessert platter, mix them with popcorn for a sweet-salty combo, or crush them up as a sundae topping. The possibilities are endless!
Still craving more dessert inspiration? Swing by our recipe collection and check out other no-bake wonders. You’re guaranteed to find a new favorite!
Storing and Serving Cool Whip Candy
How to Properly Store Your Cool Whip Candy
Storing Cool Whip Candy is a breeze—just keep it in the freezer! Use an airtight container to lock in freshness and prevent freezer burn. Be sure to store the candy in single layers with parchment paper in between to stop them from sticking together. This way, each piece stays picture-perfect and ready to devour.
When stored correctly, Cool Whip Candy can last up to two weeks—though, honestly, it’s so good it rarely makes it that long! Perfect for whipping up ahead of time for parties, gifts, or just stocking up for late-night cravings.
Best Ways to Serve Cool Whip Candy
When it’s time to serve, grab the candy straight from the freezer. The firm, chewy texture is downright delightful when cold, and it keeps its shape better, too. If you want to zhuzh it up a bit, arrange the pieces on a dessert tray with other treats—think cookies, brownies, or even fresh fruit for some balance.
For a more indulgent serving idea, pair Cool Whip Candy with a hot cup of cocoa or coffee. The rich chocolatey flavor of the candy is a dreamy match for warm drinks. Trust me, it’s a combo worth savoring!
Wrapping It Up
Why You’ll Fall in Love with Cool Whip Candy
If simplicity, affordability, and irresistible flavor are your jam, then Cool Whip Candy is about to become your new obsession. It’s a recipe that checks all the boxes—easy to make, endlessly adaptable, and pretty much guaranteed to impress anyone you share it with.
Whether you’re whipping up a batch for a holiday gift, a bake sale, or just because you’ve got a hankering for homemade candy, this recipe has your back. Plus, who doesn’t love a dessert that’s freezer-friendly and can satisfy chocolate cravings in minutes?
One Final Tip
Don’t be afraid to get creative with it. Experiment with new toppings, coatings, and mix-ins to make the recipe truly your own. And most importantly, have fun in the kitchen!
If you’re hungry for more ideas (and who isn’t?), make sure to swing by our desserts section for plenty of recipes that’ll make your taste buds happy. After all, sweet treats are meant to be shared—and enjoyed to the fullest!
Print
Cool Whip Candy – The Easiest 3-Ingredient Dessert Recipe You’ll Love
- Total Time: 1 hour
- Yield: 24 candies 1x
Description
Looking for a no-bake treat that’s as easy as it is delicious? This Cool Whip Candy melts in your mouth with its creamy texture and bursts of flavor. Perfect for parties, holidays, or a quick sweet fix!
Ingredients
- 1 tub (8 oz) Cool Whip (thawed)
- 2 cups powdered sugar
- 1 cup semi-sweet chocolate chips (or milk chocolate, if preferred)
- 1 tsp vanilla extract (optional, for extra flavor)
- Sprinkles, crushed nuts, or shredded coconut (optional for decorating)
Instructions
First things first—grab a microwave-safe bowl and toss in those milk chocolate chips. Melt them in the microwave in 30-second bursts, stirring between each round. Don’t overdo it—burnt chocolate smells like heartbreak! Once it’s smooth and creamy, set it aside to cool to room temperature. This step is key because adding Cool Whip to hot chocolate is a recipe for disaster (or a melty mess, to be exact).
Here’s where the magic happens. Take your thawed Cool Whip and gently fold it into the melted chocolate. It might look a little chunky at first—don’t panic, that’s normal. Keep folding patiently (and gently!). You’ll end up with a light, mousse-like mixture that’s already screaming “eat me!”
Pour the chocolatey goodness into a parchment-lined 8×8-inch baking dish. Smooth out the top with a spatula and pop it into the freezer for about 30 minutes. Once it’s firm, take it out and slice it into squares (aim for 36 bite-sized pieces). If they’re a little uneven, who cares? Nobody’s measuring candy perfection here.
Now, for the coating. Melt the dark chocolate wafers the same way as before—short, gentle bursts in the microwave. Once melted, take your frozen candy squares and dip them into the chocolate one by one. A fork works wonders for this! Gently shake off the excess and lay them on parchment paper to set.
Once all the squares are coated, place them back in the freezer until the chocolate firms up. And voilà! Your Cool Whip Candy is ready to steal the show. Serve it straight from the freezer for that perfect chewy texture. Trust me, everyone’s gonna ask for the recipe.
Notes
- Flavor Twist: Add a few drops of mint, almond, or orange extract to the Cool Whip mixture for a unique flavor.
- Decorating Fun: Use colored sprinkles or edible glitter for festive occasions.
- Storage: Keep in an airtight container in the fridge for up to a week.
- Prep Time: 15 minutes
- Cook Time: 45 minutes
- Category: Dessert, Candy
- Method: No-Bake
- Cuisine: American
Nutrition
- Serving Size: 1 candy bite (Based on the recipe yielding 24 candies)
- Calories: ~80
- Sugar: 8g
- Sodium: 10mg
- Fat: 3g
- Saturated Fat: 2g
- Unsaturated Fat: 1g
- Carbohydrates: 12g
- Fiber: 0.5g
- Protein: 0.5g
- Cholesterol: 0mg
Keywords: Cool Whip Candy , No-Bake Candy Recipe , Easy Holiday Treats , Cool Whip Desserts , Chocolate Dipped Candy , Party Desserts

